Build an opening that keeps you growing
In OpenFront 1v1, emptying your army to grab land can hand your opponent the lead. A stronger opening captures territory while preserving population growth and enough troops to defend. Your spawn, attack timing, and first buildings should all support that balance.
Before choosing your position, check the match settings. Modifiers such as increased gold, compact maps, or extra starting gold can change how quickly expansion gives way to expensive buildings. Practice under comparable settings when testing an opening; otherwise, a faster result may reflect the lobby rather than a better decision.
Use this sequence to organize your early game:
- Choose a spawn with accessible green terrain and nearby tribes.
- Capture wilderness without repeatedly draining your available troops.
- Identify bots you can conquer cheaply or completely surround.
- Build population capacity and choose an economic or nuclear plan.
- Reassess your defensive strength before committing against the human opponent.
Choose terrain and plan your first captures
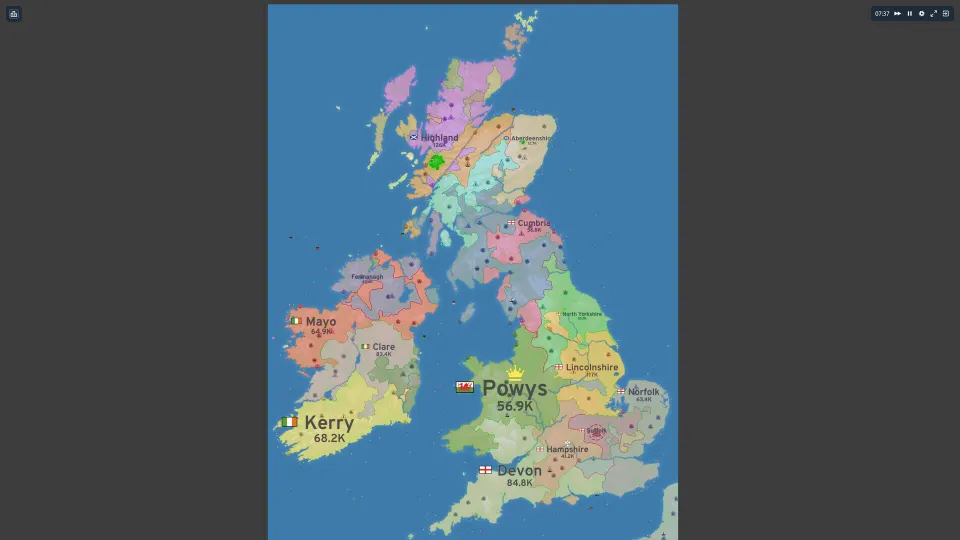
Terrain affects how efficiently you can grow. OpenFront represents elevation with green, brown, and white areas. Hold the space bar to inspect terrain while evaluating your spawn and expansion routes.
| Terrain color | Terrain type | Opening implication |
|---|---|---|
| Green | Plains | Easiest to capture; prioritize accessible stretches for efficient expansion. |
| Brown | Highlands | Harder to capture; consider the cost when choosing between nearby routes. |
| White | Mountains | Hardest to capture; a mountain-heavy start can slow your opening. |
Nearby tribes are useful targets. Hover over neighboring territories to distinguish tribes, nations, and human players. Tribes are the easier AI opponents; nations are stronger and should not automatically receive the same attack commitment.
Look beyond the first bot touching your border. A capture that helps surround another opponent can be more valuable than an isolated patch of easy terrain. Completely surrounding an opponent triggers annexation, absorbing its remaining territory and gold without paying the troop cost of attacking every remaining tile.
That makes the route toward an encirclement important. Compare the territory you must capture to complete the surround with the cost of directly conquering the target. The annexation itself avoids further combat, but reaching that position can still require substantial expansion.
Water access is also useful when you intend to build ports. However, do not sacrifice an otherwise strong opening merely to reach a coastline. The fast nuclear approach described by this ranked strategy video emphasizes green terrain and annexations while deliberately skipping ports.
Manage attack size and defensive strength
Three different measurements matter during expansion: how full your population capacity is, what percentage of troops you send, and how densely your remaining troops defend your land. Confusing them leads to oversized attacks.
| Measurement | What it describes | How to use it |
|---|---|---|
| Population fullness | Current population relative to maximum capacity | Judge whether growth is being slowed by depletion or approaching capacity. |
| Attack percentage | The share of current troops committed when attacking | Adjust the size of each commitment to the target. |
| Shield indicator | Defending troop density across your territory | Check how much defensive strength remains after expansion or attacks. |
The commonly taught growth benchmark is roughly 42% of maximum population. This refers to population fullness, not an instruction to set your attack slider to 42%.
The community Attacking Guide derives that benchmark from version-23 mechanics and carries an outdated-information notice. Use it as a practical reference, with the growth display helping you judge your actual position.
The beginner tutorial describes green growth numbers as approaching maximum growth and orange numbers as having passed the peak. During safe expansion, watch that transition instead of clicking continuously. Repeated attacks can leave too few troops available and force a lengthy recovery.
For bots, the beginner tutorial suggests an attack of around 40% after growth turns orange. Treat this as a starting point for ordinary tribe captures. Terrain, target strength, and pressure from your human opponent can justify a different commitment.
Before sending another attack, inspect the first one's progress. Committed troops are unavailable for defense, and the documented mechanics also exclude attacking troops from population growth. Several individually modest attacks can therefore leave you exposed when launched together.
Spend gold around your win condition
Cities, ports, and factories serve different purposes. Choose purchases according to the problem your position needs to solve.
| Building | Main benefit | When it supports your plan |
|---|---|---|
| City | Increases maximum population capacity | You need room for a larger population and army. |
| Port | Generates income through access to water | You have a suitable coastal or river position and want economic growth. |
| Factory | Generates income without requiring water access | You are landlocked or pursuing an economy based on factories. |
The general beginner approach alternates cities with economic buildings: city, port, city, port, with factories filling the economic role when landlocked. This develops population capacity and income together.
Ports and factories share a price progression. Buying one affects the price of the next economic building, so switching building types does not restart the cheaper opening purchases. Plan them as parts of one spending sequence.
The ranked nuclear approach makes a different tradeoff. It prioritizes rapid territorial growth, cities, some factory income, and reaching missile silos and nuclear weapons quickly. Skipping ports reserves spending for that sequence.
Neither spending pattern should become automatic. A port investment supports continued income, while money reserved for a planned silo serves a specific attack timing. Decide which outcome you are pursuing before repeatedly spending on whichever building is currently affordable.
Avoid leaving gold unused without a purpose. Saving toward a planned purchase is reasonable; accumulating money while population capacity or income falls behind can weaken your position. After each substantial conquest, review whether your next purchase still matches the situation.
Turn your advantage into a decisive attack
Once easy expansion slows, compare your position with the human opponent. Check available troops, terrain along the likely front, and whether your next investment improves immediate fighting strength or future income.
The two approaches below provide useful frameworks for that decision.
| Approach | Main priorities | Important tradeoff |
|---|---|---|
| Economy-supported play | Cities alongside ports or factories | Economic spending must have time to contribute before the decisive fight. |
| Fast nuclear pressure | Green-terrain expansion, annexations, cities, factories, then silos and nuclear weapons | Spending toward the strike must leave enough strength to survive beforehand. |
For direct attacks, terrain still matters. The attacking mechanics describe plains as more favorable to the attacker than highlands or mountains. Defense posts also affect combat losses, so a short route into defended terrain may be less attractive than it first appears.
Check the opponent's defensive density as well as territorial size. A large territory is not automatically weak, and a small territory can contain a concentrated defending force. Watch for changes after the opponent commits troops elsewhere rather than assuming an opening exists.
For nuclear pressure, identify a useful target before committing your spending. The ranked strategy video specifically highlights clustered enemy cities as an opportunity and notes that an atomic bomb can be useful against such concentrations.
After any major commitment, reassess. A successful attack should improve your position without leaving your remaining territory easy to take. If expansion has stalled or your reserve is depleted, pause additional commitments and address the weakness before extending the offensive.
FAQ
What should I practice first in this openfront 1v1 guide?
Practice expanding without exhausting your available troops. Repeat the wilderness and tribe phases under similar settings, watching growth and the force remaining after each attack. Once you can maintain steady expansion, add deliberate annexation routes and a consistent spending plan.
What is the best attack percentage against bots?
Around 40% is a tutorial starting point when growth has turned orange, not a universal setting. A tribe on plains, a mountain-heavy target, and a stronger nation present different costs. Check progress and your remaining defense before sending another attack.
Should I click attacks at fixed time intervals?
Use changes in troop availability, growth, and attack progress to guide your timing. A fixed rhythm can keep committing troops even when the previous attack has not achieved enough. Reassess after each commitment, especially when the human opponent can threaten you.
Should I always skip ports in ranked 1v1?
Skipping ports belongs to a specific fast nuclear approach. Ports remain useful for an economy supported by water access. Choose based on your intended spending sequence and how soon you expect the decisive confrontation.
Is 42% always the correct population level?
It is an approximate growth benchmark associated with the documented formula. Defensive needs can justify holding more troops, and an important attack can temporarily take you below it. Use the benchmark to understand growth while making decisions around the actual threat.
Does choosing a good spawn guarantee a win?
No. Accessible plains and nearby tribes improve your opening opportunities, but poor attack commitments or unfocused spending can waste them. Combine the spawn advantage with controlled expansion, efficient captures, and purchases that support your next objective.